Preparing Your Home for Hurricane Season: October Checklist

Blake Brown • November 5, 2025

Whether you already live in one of our custom homes or are still planning your build, the October timeframe is ideal for one last clean sweep before the worst of hurricane season typically hits the Texas Gulf Coast. As your trusted partner at South Texas Home Builders, we want to walk you through a structured checklist—material durability, structural integrity, and seasonal prep—so your home is truly ready.


Why October?ï»ż

The Atlantic/Gulf hurricane window runs through November, and by October you’re entering the “tail” of peak season. According to meteorologists, storms in the Gulf can still develop into October and early-November. Sol-Ark+2readysouthtexas.gov+2


Plus, the summer heat has done a number on your home’s exterior—salt air, UV, wind fatigue—so this is the smart moment to inspect and reinforce.


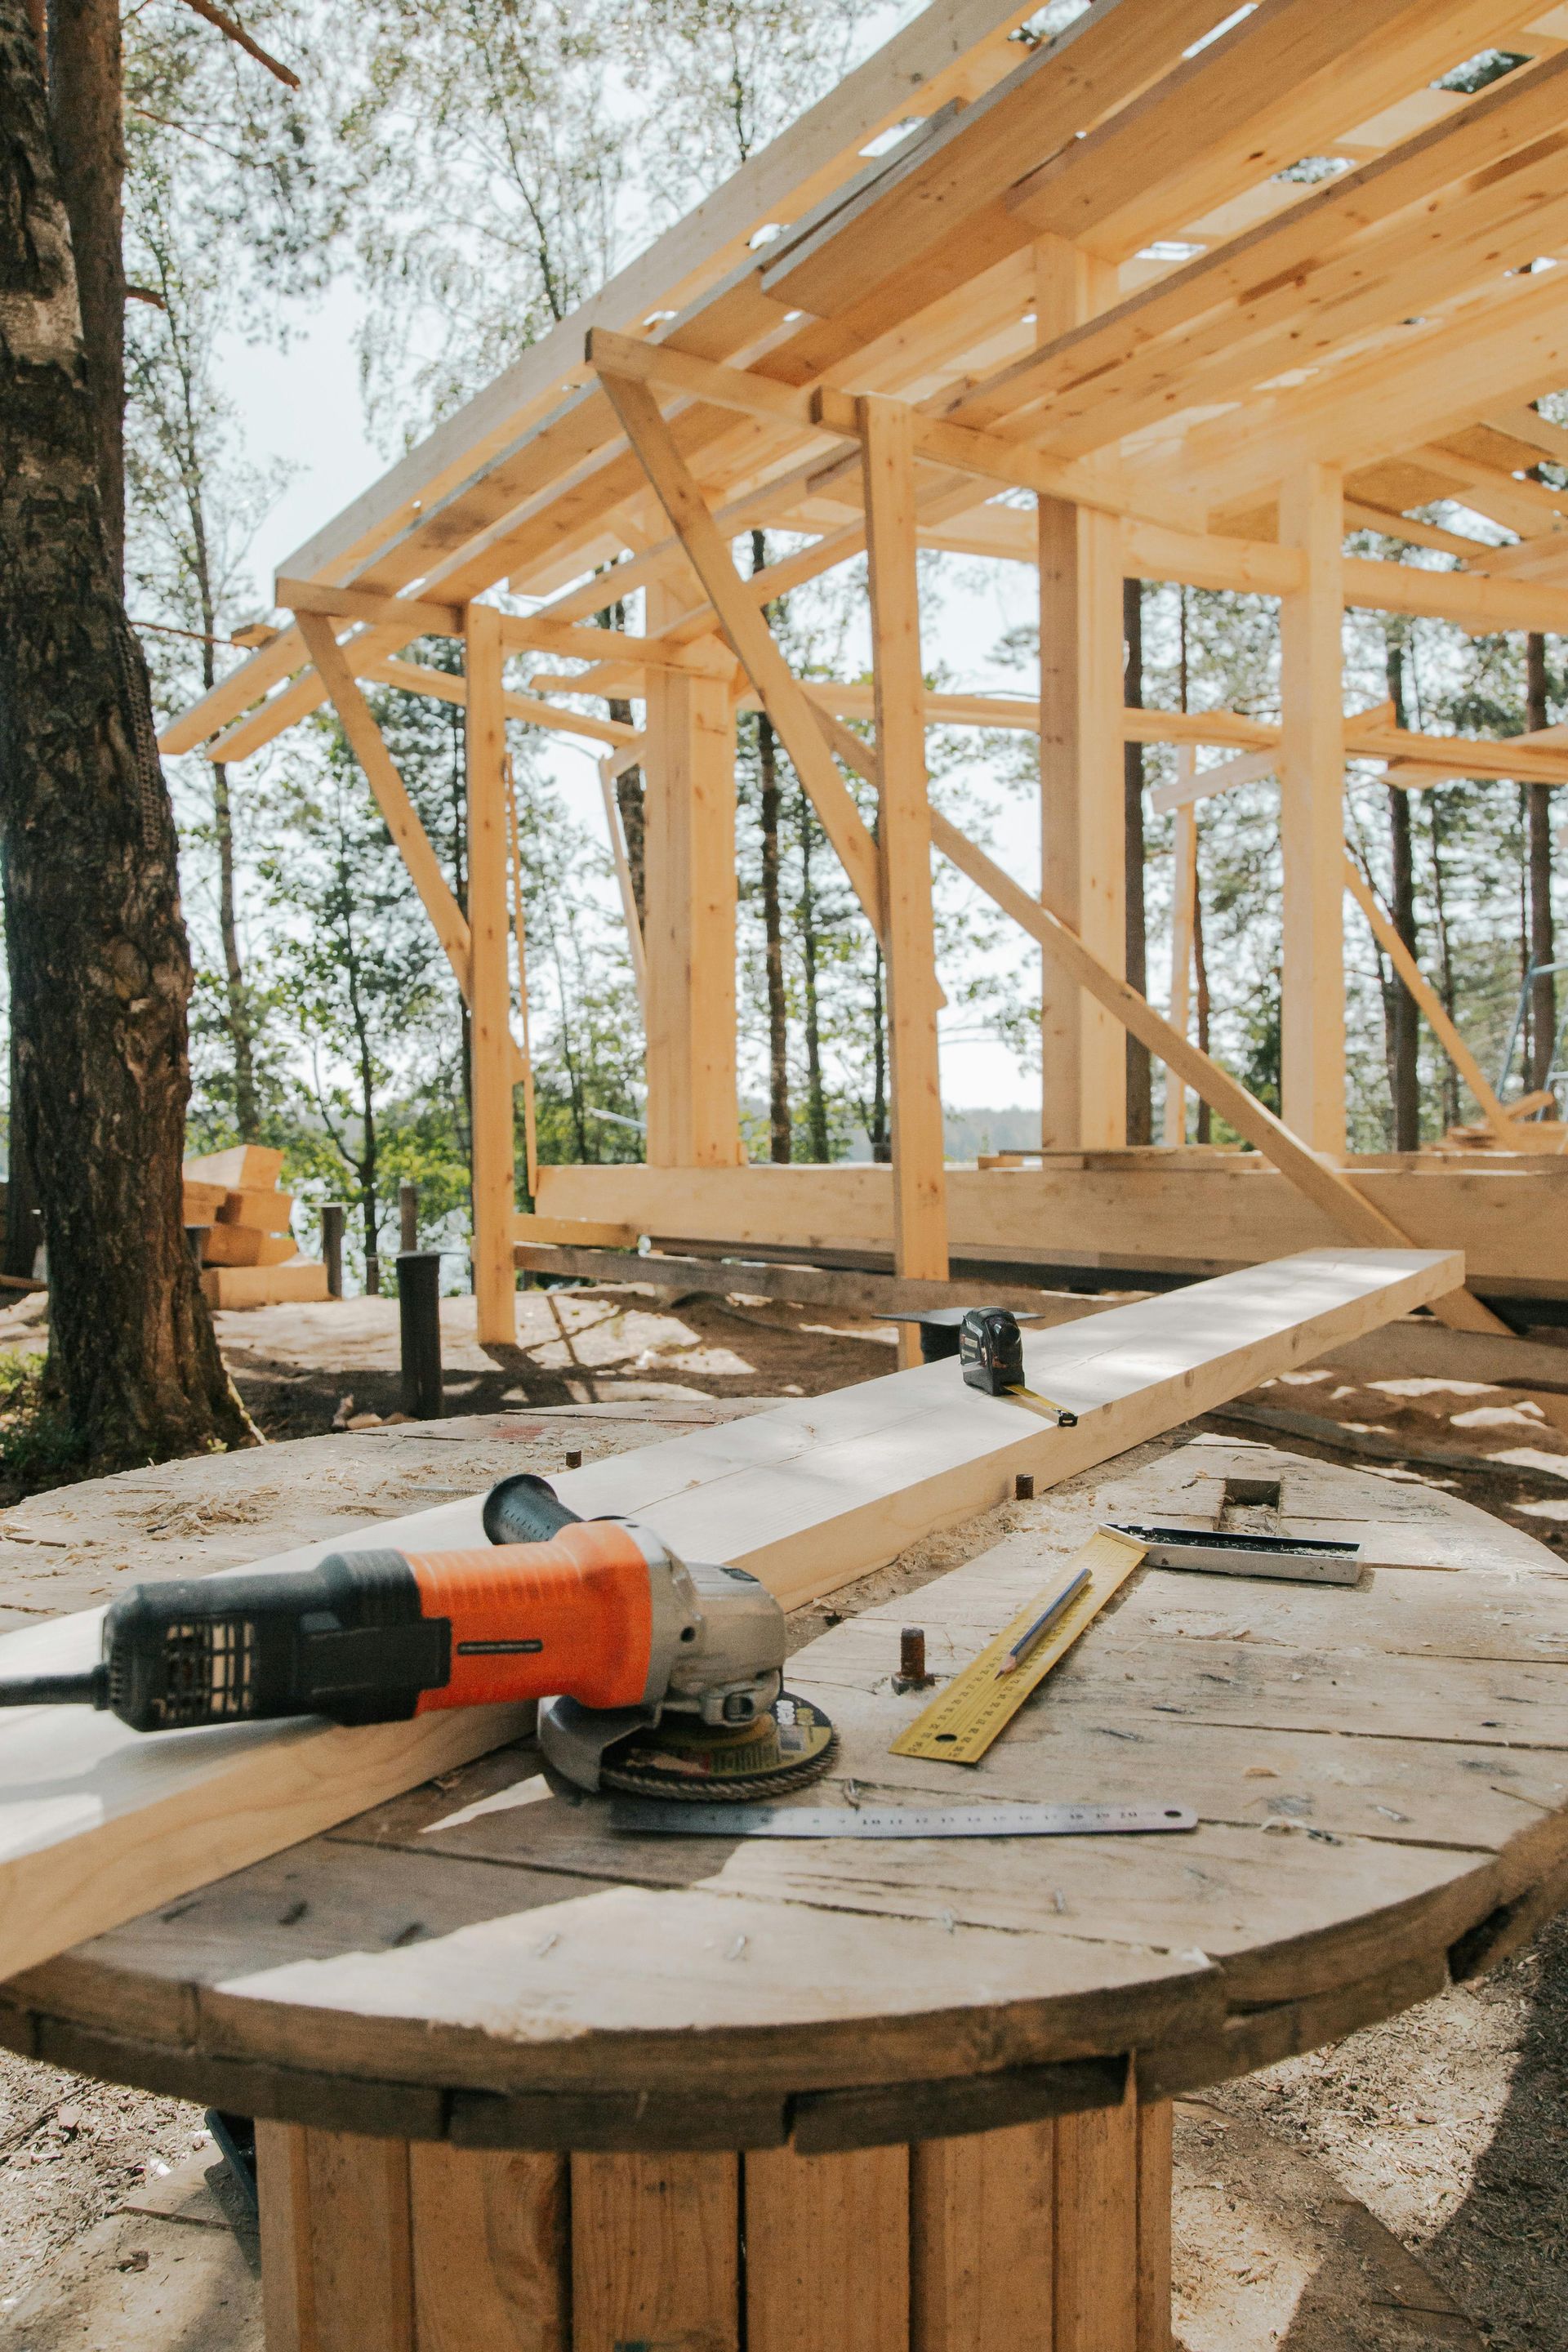
🔍 1. Structural & Roof + Flashing Inspection

Why: High winds and heavy rains don’t just test finishes—they test how your home was built. A good home is more than pretty; it’s durable.

  • Climb up (or have a pro) inspect your roof for loose or missing shingles/metal panels, screws backing out, and signs of uplift.
  • Check flashing around chimneys, vents, skylights, and especially where the roof meets walls. Salt-air corrosion can weaken flashing fast.
  • Inspect roof-to-wall connections: hip roofs, hurricane straps, clips all matter. The built form should resist uplift. readysouthtexas.gov+1
  • Ensure your gutters and downspouts are clear of debris (fallen leaves, seed pods, sand) so that heavy rain drains properly. Clogged gutters mean water backs up under eaves or into siding. readysouthtexas.gov+1
  • Check seals around roof penetrations (antennae, HVAC vents, plumbing stacks). Replace caulk or flashing tape that's cracked or peeling.


Material‐Durability Note:
Salt air + UV + wind = faster deterioration. Use corrosion-resistant fasteners (304/316 stainless or galvanized), and if you have metal roofing or siding, check for blistering or pitting at edges.


2. Windows, Doors & Storm Shutters

Why: These are the vulnerable openings; wind + debris = most damage begins here.

  • Test all exterior doors for proper latching, tight fit, and inspect weather-stripping. If you don’t yet have impact-rated glass or shutters, consider adding them as part of your long-term durability build-out.
  • Check windows for loose mullions, failed gaskets, and ensure the frames are securely anchored.
  • If you have storm shutters, inspect mechanisms (tracks, locks), make sure they deploy easily. If you use temporary plywood, inspect for rot, warping, or screws coming loose.
  • Remove or secure patio doors/garden doors: these large openings must have strong connections—look for dead-bolts, threshold fasteners, flush sill plates.
  • Clear the sill/track of debris so water doesn’t accumulate and push on the door during heavy rain.


Durability Tip:
For coastal homes we recommend, in new builds, choosing
impact-rated glazing or permanent shutters instead of one-time plywood. For existing homes: upgrade in phases. A strong window system pays off over time.


3. Exterior Walls, Siding & Fasteners

Why: Even when the roof and openings hold up, wind-driven rain and salt air can compromise siding, sheathing, and fasteners.

  • Walk the perimeter and inspect siding materials (whether hardy-board, fiber-cement, metal paneling, or wood): look for cracks, cupping, rust stains, blisters, or corrosion around fasteners.
  • For wooden siding or trim: check for rot or delamination, especially at bottom edges where water can wick up from moisture.
  • Inspect fasteners: are nail or screw heads popping? Do you see rust trails or stain indicating failed corrosion protection?
  • Examine joints and corners—caulk or sealant often fails first here. Reseal around penetrations, corners, and where siding meets other materials (eaves, roof overhangs).
  • Consider applying a protective coating or finish if the siding shows wear — even a top‐coat can buy years of life in salt‐air conditions.


Material Tip:
Use
316 stainless steel or hot-dip galvanized fasteners in coastal builds. If you’re doing a retrofit, consider replacing any visibly rusted fasteners during this October inspection.


4. Gutters, Downspouts & Drainage

Why: Storm surge and heavy rainfall often cause more damage via water intrusion than wind—especially in coastal low-lying areas.

  • Clear out all gutters of leaves, seed pods, sand, or mulch to ensure free flow.
  • Check downspouts: make sure they are intact, connected, and that they lead water away from the foundation (6–10 ft minimum) or into splash blocks.
  • Inspect the grade around the home’s perimeter: ensure soil slopes away from foundation to avoid water pooling.
  • If you have a crawl space or slab build: verify vents and weep holes are clear so standing water can drain.
  • Consider installing rain-barrel bypasses or surge tanks if you’re in a flood‐prone zone—helps moderate heavy downpour volumes.

5. Landscaping & Site Preparation

Why: Outdoor items and vegetation become projectiles in high-wind events—they’re not just aesthetic, they affect safety.

  • Trim trees and shrubs near the house: remove dead limbs, branches hanging, or trees within falling distance of the structure. Many wind‐related damages start this way. readysouthtexas.gov+1
  • Secure or remove loose outdoor furnishings: grills, patio furniture, planters, kids’ toys, umbrellas—all of these become hazards in hurricane-force winds.
  • Check storm drains / culverts around your lot: clear debris so water can exit the lot quickly.
  • If you have fencing or gating, inspect posts and attachments. A failed fence during a storm can ripple damage onto the home.
  • Consider investing in ground cover plants or mulch to reduce topsoil erosion on slopes, which can destabilize foundation zones during heavy rain.


6. Garage & Door Systems

Why: The garage often has the largest opening on coastal homes and can be a structural weak-point if not prepared.

  • Inspect your garage door for signs of wear—panels dented, rollers stuck, opener alignment off.
  • Reinforce if you don’t have a wind-rated door: install a garage door brace kit, or look into upgrading to a certified wind-load door in severe zones.
  • Ensure any service doors (man-doors or side doors) have dead-bolts, flush thresholds, and are secured.
  • Remove or secure stored items near the ceiling or upper shelves that could fall during vibration or movement.


7. Utilities, Systems & Documentation

Why: After a storm hits, long-term damage often comes from water intrusion, electrical problems, and lack of documentation to claim insurance.

  • Label clearly utility shut-offs (main water, gas, electrical) and ensure all household members know how to turn them off safely.
  • Have a digital backup of all key documents (home insurance policy, building plans, warranties, equipment manuals). Store off-site or in the cloud. Home Creations+1
  • Inventory major appliances, systems (HVAC, generator, solar), and take photos of their condition now (pre-storm baseline).
  • Consider installing a battery backup or generator, especially if your home is remote or power restoration is slow.
  • Review your homeowners and flood insurance—verify deductibles, wind vs. flood coverage, and make sure your policy reflects your build’s value.


8. Final Walk-Through Before Peak Weather

Why: One final inspection ensures nothing is overlooked.

  • Check that all storm shutters or window protections are operable and ready.
  • Walk the perimeter one last time: check that outdoor items are secured, downspouts are attached, and there is no loose fascia or flashing.
  • Take a few “before” photos of the exterior, roof, major systems—timestamped photos taken now are invaluable if you need to file a claim after a storm.
  • Brief your household on what to do when a watch or warning is issued: where to shelter, what to secure, what to do with landscaping and outdoor items.
  • Update your emergency kit and plan: As the season wanes, this is also a good time to refresh perishable items, check batteries, and review evacuation routes (including ones potentially affected by coastal flooding).


Why This Matters: The South Texas Advantage

At South Texas Home Builders, our mission is to deliver homes that reflect durability, intelligent design, and coastal-ready craftsmanship. When you partner with us for a custom build in the coastal or rural environment of Texas, we emphasize:

  • Elevated foundations or flood-mitigation design where required
  • Corrosion-resistant materials, hurricane-rated systems, strong roof-to-wall connections
  • Exterior finishes and coatings designed for UV, salt air and wind
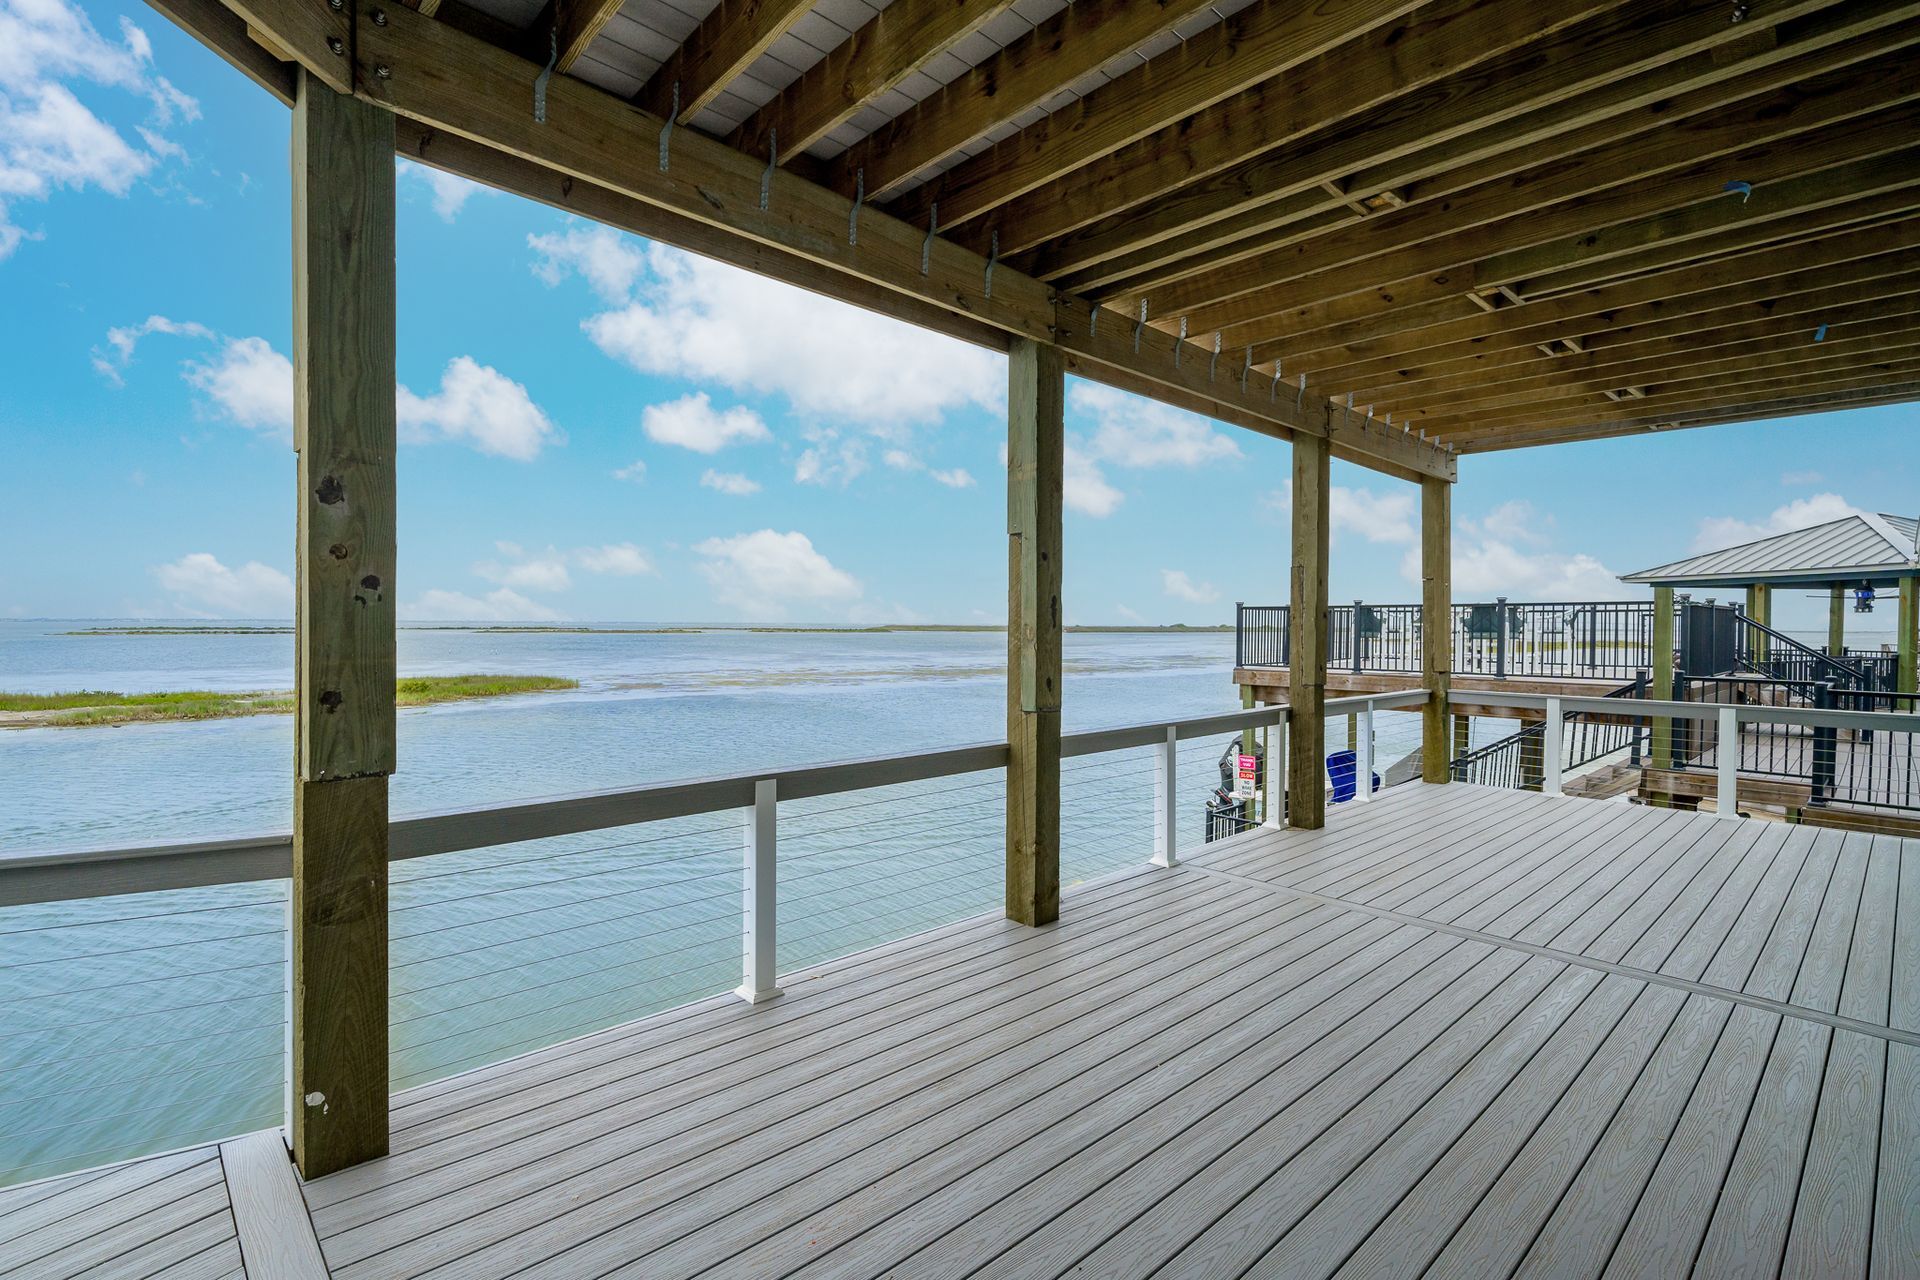
  • Functional outdoor/overflow spaces built to hold up in the elements


So when you use this October checklist, you’re reinforcing exactly the strengths that make your custom home exceptional.


Key Takeaways

  • October is the prime time to inspect, secure, and reinforce before the final stretch of hurricane season.
  • Focus on structural integrity, openings (windows/doors), exterior materials, and then site/landscaping, utilities, and documentation.
  • Doing the preparation now not only lowers risk—it preserves value, prevents costly repairs, and gives you peace of mind.
  • If you discover something during your inspection that needs attention (e.g., flashing corrosion, missing hurricane clips, window frame wear), you still have time to act before major storms arrive.


Want Help?

If you’d like us to review your home’s structural resilience or help plan a durability upgrade (impact-rated doors, stronger roof clips, upgraded siding), we’re here. Contact our team at South Texas Home Builders and let’s ensure your coastal or rural home is built—and maintained—with the resilience you deserve.


Stay safe and proactive—your home is your investment and your sanctuary.

NEWS

By Blake Brown November 5, 2025
Building along the Texas Gulf Coast or in rural South Texas places special demands on every part of a home—especially around openings, transitions, and penetrations. At South Texas Home Builders, we believe durability isn’t optional; it’s built into every detail. That’s why we specify high-performance materials like ZIP System Stretch Tape when we’re sealing tricky areas that standard flashing might struggle with. Why Stretch Tape Matters In coastal and rural settings, you’ll encounter curved window sills, uneven sheathing, transitional penetration zones (like HVAC, plumbing, decks) and wind-driven rain. According to the manufacturer, “ZIP System Stretch Tape uniquely stretches in all directions to easily fit sills, curves and corners with a single piece.” Huber Engineered Woods+1 Key performance features: Bonds to a variety of surfaces (wood, concrete, masonry, metals) and works over mismatched surfaces. builderswarehouse.com+1 High elongation (800-1,200%) and performance in temperatures down to 0 °F. Huber Engineered Woods+1 An advanced acrylic adhesive that claims superior adhesion even around fasteners. builderswarehouse.com+1 For STHB’s custom homes, this means reduced worry about water intrusion at critical zones, more efficient installation, and long-term performance that complements our “built-for-the-coast” standard. Where We Use It Here are typical applications where we integrate ZIP System Stretch Tape as part of our durability strategy: Window & door rough-openings : Instead of piecing many small tapes around awkward openings, the stretch tape allows a single go-around to form a tight, continuous seal. Huber Engineered Woods+1 Sills and curved transitions : On wrap-around porches or custom façade designs, curved details often require material flexibility. The stretch tape accommodates these without wrinkling or lifting. Sill-to-wall and deck-to-wall transitions : Where siding, sheathing, membrane and flashing meet, this tape bridges different planes and materials. Retrofits & difficult surfaces : In the remodel or upgrade context, older sheathing, irregular substrates or weather-exposed zones are tough to seal—stretch tape helps overcome those issues. Installation Insights from STHB’s Perspective We've found that specifying the material is only part of the story. Proper installation makes the difference: Surface prep matters : Make sure all sheathing is flush, fasteners are properly set (no “shiners” or over-driven nails) so the tape has a smooth adhesion surface. Huber Engineered Woods Rolling the tape : The advanced acrylic adhesive performs best when a pressure roller is used to activate the bond. Wrinkles or “fish-mouths” compromise performance. Huber Engineered Woods Correct sequencing : Apply stretch tape in coordination with other barriers (WRB, air-barrier membranes) so all layers remain continuous. Exposure considerations : While the manufacturer offers an exposure period (180 days when used with ZIP System sheathing) builderswarehouse.com+1 , for coastal builds we aim for full enclosure and primary cladding ASAP to minimise UV/salt-air exposure. Why This Aligns with Our Coastal-Durability Philosophy Resilience: The coast demands that homes withstand wind, moisture, and shifting conditions. A robust flashing system around openings is a major vulnerability—sealing it well raises the whole home’s resistance. Longevity : Materials that fail early create maintenance burdens. By choosing high-performance tape, we reduce future callbacks, preserve finishes, and deliver homes that hold up. Efficiency : In custom builds, time is value. Stretch tape allows fewer pieces, faster application, and less risk of seams coming apart. That means tighter schedules, fewer delays, and better final product for homeowners. Specification transparency : When we show clients the systems we use (e.g., ZIP System sheathing + stretch tape + metal flashing) we build trust—and that transparency reinforces value. A Practical Snapshot: What to Ask When Reviewing Build Specs If you’re building or buying a coastal/rural custom home, here are questions worth asking: Is the flashing system around windows/doors rated for curved or irregular openings? What material is being used at sill pans and transition zones where siding meets sheathing? Is the adhesive rated for the coastal environment (salt-air, UV, humidity)? Are installation crews trained on the correct use of high-performance tape (rolling, sequencing, surface prep)? What is the expected maintenance or inspection schedule for these flashing zones? In summary: FLashing is often an unseen part of a home, but it’s one of the biggest contributors to durability—especially in coastal and rural contexts. At South Texas Home Builders, specifying ZIP System Stretch Tape reflects our commitment to building smarter, stronger, and longer-lasting homes. The result: clients get not just a house, but a home that stands up to where it’s built.
By Blake Brown November 5, 2025
Fall along the Texas coast marks the perfect time to tune up your home. Summer heat and storms leave residue—salt, sand, and strain on materials. A simple seasonal inspection protects finishes and extends lifespan. South Texas Home Builders recommends a focused checklist each autumn to keep homes at their best. 1. Roof and Exterior Inspect shingles, flashing, and fasteners for looseness or corrosion. Clean gutters and downspouts; flush with a hose to confirm drainage. Rinse siding, railings, and exterior metal to remove salt buildup. Check caulk and paint for cracks or fading, especially on sun-facing walls. Small touch-ups now prevent water intrusion later. 2. Windows and Doors Verify weather-stripping makes full contact. Lubricate hinges and locks with silicone spray to resist salt corrosion. Clear tracks of sand and debris; ensure weep holes drain properly. Re-seal any perimeter gaps before cooler, humid months arrive. Well-maintained openings improve comfort and efficiency. 3. Systems and Interiors Schedule HVAC service; replace filters and inspect coils. Test smoke detectors, GFCIs, and surge protectors. Flush water heaters to remove mineral buildup. Check attic insulation for settling or pest intrusion. Interior maintenance supports both energy savings and indoor air quality. 4. Grounds and Outdoor Living Areas Trim trees and shrubs away from structures. Inspect fences, decks, and pergolas for loose connections. Drain and clean water features to discourage algae growth. Store or cover outdoor furniture before peak fronts move through. Prepared outdoor spaces weather winter with minimal repair. Fall maintenance keeps the coastal environment working with you, not against you—a rhythm of respect between home and climate.
By Blake Brown November 5, 2025
Building a custom home is both exciting and demanding. The process involves dozens of decisions, inspections, and milestones—but it’s also one of the most rewarding experiences a homeowner can undertake. Knowing what to expect keeps the process smooth and predictable. At South Texas Home Builders, transparency and communication guide every build. Here’s how a typical project unfolds from the first meeting to move-in day. 1. Design and Planning Every home starts as a conversation—your ideas, your site, your goals. Initial design sessions: refine layout, size, and architectural style. Site evaluation: analyze soil, drainage, access, and orientation to wind and sun. Budget alignment: confirm that specifications match financial expectations before drafting plans. Permitting: submit engineered drawings and coastal-code documents to local jurisdictions. Proper planning eliminates most surprises later. A few extra weeks invested here often saves months in construction. 2. Foundation and Framing Once the ground breaks, the home’s shape emerges quickly. Foundation work: soil preparation, forms, steel placement, and concrete pour—each inspected for strength and elevation accuracy. Framing: walls, roof trusses, and structural connectors establish the skeleton. Sheathing and wrap: create a moisture barrier critical to coastal durability. By the end of this phase, the home’s footprint and roofline are visible, and it begins to take on its final proportions. 3. Mechanical, Electrical, and Plumbing Systems Before the walls close, the mechanical heart of the home is installed. HVAC systems rated for salt-air conditions. Electrical wiring with surge protection and ample outlets for future technology. Plumbing lines pressure-tested to ensure integrity. A pre-cover inspection confirms everything is code-compliant and accessible for service. 4. Finishes and Detail Work The visible artistry happens here. Drywall, trim, cabinetry, and flooring bring warmth and character. Countertops, tile, lighting, and hardware personalize each room. Exterior finishes—siding, paint, decks—seal the home against the coastal climate. Clients often visit weekly at this stage, watching selections come to life. 5. Final Steps and Orientation When construction wraps, it’s time for detail and documentation. Punch list: fine-tune any last details. Professional cleaning: prepare for move-in. Walk-through: review systems, warranties, and maintenance schedules. A well-built custom home doesn’t end on move-in day—it begins a long relationship between the homeowner, the builder, and the coast.
By Blake Brown November 5, 2025
The first cool fronts of fall signal more than a change in weather—they mark the start of gathering season. Whether it’s a family meal or friends arriving from out of town, entertaining by the coast takes on its own rhythm: open doors, shared meals, and laughter carried by the breeze. Designing for hospitality means planning spaces that welcome guests effortlessly. South Texas Home Builders focuses on flow, durability, and warmth—both aesthetic and literal. 1. Kitchens Built for Company The kitchen is command central during the holidays. It should handle traffic gracefully without feeling crowded. Work triangles become work zones: dedicate one for prep, one for cooking, one for plating and service. Oversized islands provide seating and staging; durable quartz or sealed stone resists stains from marinades and wine. Secondary sinks or beverage stations keep guests out of the chef’s path. Ventilation and lighting should be generous—humidity and low light turn long cooking sessions into fatigue. Cabinet finishes and hardware matter too: matte paints and soft-close hinges hold up against humidity and holiday use alike. 2. Outdoor Areas as Extensions Mild coastal winters mean patios stay active well into December. Covered cooking zones allow grilling or smoking year-round. Built-in heaters or fire tables extend evenings without bulky equipment. Durable seating with washable cushions makes setup quick and stress-free. Ambient lighting —string lights, sconces, or pathway fixtures—creates warmth without glare. Link outdoor and indoor spaces with large sliding or folding doors so conversation flows as easily as the breeze. 3. Preparation Meets Presentation A few structural details simplify hosting for years to come. Wide walkways (at least 42 inches) between counters or furniture allow easy movement. Dedicated storage near dining areas keeps linens, platters, and utensils close at hand. Hard surfaces underfoot —tile, sealed concrete, or LVP—make cleanup fast after sandy shoes or spills. Plan lighting and outlets for seasonal décor. The best holiday homes accommodate celebration without temporary fixes. 4. After the Guests Leave Ease of maintenance ensures gatherings stay enjoyable, not exhausting. Rinse patios with fresh water to remove salt film and food residue. Check gas lines and burners for corrosion before long-term storage. Touch up cabinetry and re-seal counters if wear shows from heavy use. Coastal homes are meant to be lived in—fully, joyfully, and often. Thoughtful design keeps them ready for whatever the calendar brings next.
By Blake Brown November 5, 2025
Building on the Gulf Coast means designing with water in mind. Wind can be forecasted; water is patient and persistent. Elevation, drainage, and material choices determine whether a home withstands the next storm or succumbs to it. At South Texas Home Builders, flood resilience is not an upgrade—it’s a baseline. 1. Start with Site Intelligence Every lot has a story: how water moves, where it lingers, and what the surrounding terrain does in a downpour. Survey elevation early. Identify base flood elevation (BFE) and local freeboard requirements. Study the watershed. Neighboring ditches and culverts often dictate where your water will go. Design grading to flow away. Even a two-percent slope prevents ponding near foundations. Planning drainage before construction avoids the costlier exercise of managing it afterward. 2. Build Above, Not Just Around Elevation protects both structure and systems. Raised foundations or piers keep living areas above projected surge levels. Flood vents or breakaway walls relieve hydrostatic pressure beneath elevated floors. Mechanical systems —HVAC units, electrical panels, and water heaters—belong well above grade. Materials below the design flood elevation should be non-absorbent and easy to disinfect: concrete, tile, or pressure-treated framing. 3. The Envelope and Openings Water rarely enters where people expect. Flashing and sealant details at doors, windows, and roof intersections are critical. Impact-rated windows with multi-point locking hardware withstand wind-driven rain as well as debris. Properly vented roofs and attics release humidity and prevent condensation damage. The beauty of the design should hide its toughness. Each line of defense works quietly until it’s needed. 4. Maintenance as Prevention Elevation is only effective when maintained. Re-grade low spots annually where runoff has settled soil. Flush and inspect foundation vents for blockages. After any major storm, document conditions with photos for insurance and future reference. A home built for water respects its power but doesn’t fear it. Done right, flood-resistant design adds both safety and longevity to the investment.
By Blake Brown November 5, 2025
Working from home near the coast should feel like a privilege, not a distraction. The light, breeze, and sound of distant surf can be invigorating—if the space is designed thoughtfully. More homeowners along the Gulf are choosing to incorporate a dedicated office that balances productivity with peace. At South Texas Home Builders, we design home offices as functional sanctuaries—structured enough to get work done, relaxed enough to remind you why you live where you do. 1. Placement and Light Natural light boosts focus, but glare can be brutal near reflective water and sand. Orientation matters. Face north or east to capture consistent daylight without harsh afternoon glare. Layer lighting —recessed ambient fixtures, task lighting at the desk, and a warm accent source for evenings. Control brightness with tinted or Low-E glass and solar shades that preserve the view while reducing heat gain. A good office layout frames the outside scenery but doesn’t compete with it. 2. Building Comfort into Structure An efficient workspace starts with its bones. Sound control: Use solid-core doors, insulated interior walls, and soft surfaces (area rugs, fabric panels) to reduce echo. Ventilation: Offices near exterior walls can collect heat; balanced HVAC and ceiling fans keep temperatures steady. Surge-protected outlets and hardwired data lines prevent interruptions and protect electronics from storm-season surges. These details don’t draw attention, but you feel them every day you work. 3. Material Choices That Endure Humidity can shorten the life of office furniture and finishes. Desks and shelving in sealed hardwoods or composite veneer resist warping. Flooring such as engineered wood, tile, or LVP keeps rolling chairs smooth and stable. Matte wall finishes reduce glare and clean easily. Even art frames and hardware benefit from stainless fasteners and UV-resistant coatings. Coastal air doesn’t forgive shortcuts. 4. Connect Indoors and Out Small design gestures bring balance to long workdays. A glass door to a covered porch invites quick breaks and natural light. A window seat or reading chair adds dimension and doubles as guest seating. Native landscaping outside provides greenery that thrives year-round with minimal care. The goal isn’t to copy the beach—it’s to feel connected to it. A coastal home office should perform as reliably as it inspires. Build it with the same rigor you’d bring to the rest of the home, and it becomes a place you look forward to every morning.
By Blake Brown November 5, 2025
Every year brings new ideas for color, layout, and texture—but in coastal homes, trends must survive more than design cycles. They must endure humidity, sunlight, and everyday living. Looking ahead to 2026, interior design along the Gulf Coast continues to move toward sustainable materials, calm palettes, and adaptable spaces. Here’s what’s shaping the next generation of coastal interiors—and how to integrate trends that last. 1. Natural Calm and Muted Color Coastal interiors are moving away from crisp white-on-blue toward softer, earth-grounded tones. Neutral foundations: Sand, oyster, sage, and driftwood grays create warmth without heaviness. Textured neutrals: Limewash walls, rattan lighting, and matte ceramics add depth. Pops of contrast: Deep indigo or rust accents keep rooms from feeling flat. These palettes connect seamlessly with exterior materials like stone, stucco, and metal roofing—creating a unified flow from inside to out. 2. Performance Meets Aesthetics Durable finishes are quietly replacing fragile luxury. Flooring: Engineered hardwoods and high-end vinyls mimic natural grain but handle humidity. Cabinetry: Painted MDF with marine-grade sealers or composite fronts resists swelling. Countertops: Quartz and sintered stone outperform marble near salty air. Hardware: Brushed stainless and powder-coated metals prevent corrosion without sacrificing style. Coastal homes are learning that low-maintenance doesn’t mean low-design—it means smarter design. 3. Spaces That Flex Adaptability defines modern coastal living. Convertible guest rooms double as offices. Sliding partitions or built-ins help zones open or close for privacy. Integrated storage keeps open plans tidy. Multi-use furniture (banquettes with drawers, console tables with charging ports) supports smaller, efficient footprints. As work-from-home and extended family stays remain common, flexibility is the new luxury. 4. Sustainable and Local Environmental consciousness is becoming standard practice, not an afterthought. Locally sourced materials reduce transport costs and support regional craftspeople. Low-VOC finishes improve indoor air quality. Energy-smart lighting and window treatments balance daylight with thermal control. Design rooted in sustainability fits naturally within South Texas’s coastal ethos: thoughtful, enduring, and responsive to place. 5. Enduring Simplicity Trends will shift again, but certain qualities never go out of style—light, air, and flow. A well-designed coastal home feels effortless because it works intuitively with its environment. That’s the design philosophy South Texas Home Builders carries into every interior: timeless foundations that can evolve, so your home feels current not just next year, but ten years from now.
By Blake Brown November 5, 2025
Coastal homeowners often reach a crossroads: remodel what they have, or start fresh. The decision isn’t only financial—it’s structural, practical, and emotional. South Texas Home Builders helps clients navigate this decision every year, weighing the strengths of an existing home against the promise of a new one. Here’s how to approach it strategically. 1. Evaluate the Foundation and Structure Salt air, flooding, and time test every building. Start by understanding what you’re working with. Foundation integrity: Cracks, settlement, or inadequate elevation can turn small repairs into costly undertakings. Framing and roof structure: Look for corrosion on fasteners, evidence of leaks, or sagging trusses. Envelope health: If siding, flashing, and windows show consistent moisture damage, a retrofit may only mask deeper issues. When core systems fail, investing in a full rebuild often delivers better value and peace of mind than repeated patchwork. 2. When a Retrofit Shines Not every home needs a blank slate. Sound bones, dated finishes: A sturdy frame with outdated interiors is ideal for renovation. Preservation of place: Some coastal properties hold sentimental or architectural value worth keeping. Incremental upgrades: You can phase renovations—roof and siding this year, kitchen and baths next—without displacing the family entirely. The key is knowing where the line lies between “refresh” and “rebuild.” 3. Cost and Long-Term Perspective A remodel may appear cheaper upfront but can be unpredictable once walls open. New construction offers clearer budgeting but higher initial cost. Compare total lifecycle cost, not just the first invoice. Factor in energy efficiency: New builds often outperform older envelopes, lowering operating costs. Account for insurance: Elevated foundations and modern wind ratings can significantly reduce premiums. The cheapest option rarely means the best investment—it’s the one that aligns with long-term goals and maintenance capacity. 4. Design Freedom New construction lets you reimagine everything: orientation for natural light, integration of outdoor spaces, and updated coastal building standards. Retrofitting, by contrast, teaches restraint—working within the existing footprint and character. Each path has beauty. What matters most is clarity: knowing what you want your home to provide in the next 20 years. South Texas Home Builders takes either route with the same care, ensuring the result stands as strong as it looks.
By Blake Brown November 5, 2025
Coastal living delivers endless views and salty air—but also a unique set of landscaping challenges. Sandy soil, steady wind, and brackish water create conditions that demand thoughtful design. A landscape that thrives on the Texas coast isn’t about fighting the environment—it’s about working with it. At South Texas Home Builders, we’ve learned that durable landscaping starts the same way as durable homes: with the right foundation, materials, and local know-how. 1. Understanding the Ground Beneath You Coastal soil is typically sandy, alkaline, and quick-draining. That means nutrients and moisture don’t stay put for long. Amend strategically: Mix in compost and organic matter to increase water retention in beds. Plant for the conditions: Native and salt-tolerant species adapt naturally to sandy textures and high winds. Create microclimates: Use fences, retaining walls, or dense shrub plantings to shield delicate plants from salt spray. If you’re planning a new build, grading and soil prep during construction can establish drainage and planting zones before driveways or patios are poured—saving both time and labor later. 2. Plant Choices That Thrive The Gulf Coast rewards those who plant with intent. Native grasses like Gulf muhly or switchgrass add texture and stabilize sandy soils. Shrubs and groundcovers such as wax myrtle, dwarf yaupon, and lantana tolerate salt and heat. Flowering perennials —turk’s cap, black-eyed Susan, coreopsis—draw pollinators and withstand dry spells. Palms and hardwoods —sabal palm, live oak, or yaupon holly—anchor the landscape with year-round structure. Mix evergreen and seasonal plants for continuous interest without heavy maintenance. 3. Hardscape and Drainage Considerations Concrete and stone age faster near salt air. Choose materials meant for exposure. Pavers: Concrete or shell aggregate sealed annually to resist moisture absorption. Pathways: Crushed granite or stabilized decomposed granite allows drainage without cracking. Edging and walls: Concrete block or natural stone set on proper footings—avoid uncoated steel. Drainage: Subsurface drains or swales prevent ponding near foundations during heavy rain. Simple grading adjustments during construction—slopes of even 2–3% away from the home—preserve long-term structure and keep water moving. 4. Integrating Water Features A small pond, bubbler, or fountain can make a landscape feel complete, but coastal humidity and mineral-rich water require planning. Use corrosion-resistant pumps and fittings. Ensure basins are sealed and accessible for cleaning. Incorporate overflow channels tied to drainage to prevent flooding in storms. Choose stone or concrete finishes that hide salt deposits gracefully. Sound and movement from water soften the steady coastal breeze and make patios and porches feel tranquil year-round. 5. A Living Extension of the Home The best landscapes feel like they belong. They echo the palette of the home—stone tones, siding colors, roof finishes—and frame outdoor living areas with natural transitions. A coastal landscape should age beautifully, not deteriorate. When built thoughtfully, it needs less maintenance, not more. That’s the hallmark of every South Texas Home Builders project: beauty grounded in durability.
By Blake Brown November 5, 2025
Life near the coast comes with gear—fishing rods, coolers, paddleboards, tools, and sandy shoes. Without smart storage, it all migrates indoors. A garage designed for coastal living keeps order while protecting vehicles and equipment from salt and moisture. South Texas Home Builders approaches garages and mudrooms as part of the home’s overall system: ventilated, durable, and easy to clean. 1. Plan Storage Like a Room, Not a Shed Treat the garage as conditioned space for organization. Zoning: dedicate wall sections for recreation, maintenance, and storm prep. Built-ins: corrosion-resistant cabinetry, overhead racks, and slat-wall panels maximize vertical space. Lighting and power: bright, sealed fixtures and plenty of outlets make the space usable year-round. When planned early, the garage can handle workshop duties, hobby space, or even small-business operations without encroaching on living areas. 2. Materials That Resist the Environment ï»ż Standard garage finishes rarely survive coastal humidity. Floors: epoxy coatings or penetrating sealers protect concrete from salt residue. Cabinets: marine-grade plywood or powder-coated metal with rubber gaskets on doors. Hardware: stainless hinges and fasteners throughout. Ventilation: passive wall vents or small exhaust fans to remove trapped moisture. These details add decades of usability and keep rust at bay. 3. Mudroom and Transition Space A well-placed mudroom between garage and interior makes the difference between chaos and cleanliness. Built-in benches for removing shoes and boots. Cubbies or lockers for beach towels, hats, and outerwear. Hooks and drying racks for wet gear. Durable flooring like tile or sealed LVP for easy cleanup. This simple buffer protects flooring and indoor air quality by stopping moisture and sand at the door. 4. Maintenance Routine Salt doesn’t stop at the shoreline—it rides home on vehicles and gear. Rinse garage floors monthly with fresh water. Check and lubricate door hardware twice a year. Inspect seals on the main garage door for tears or stiffness. Recoat epoxy floors as needed to maintain sheen and protection. A little upkeep prevents corrosion from taking root. 5. Built for Everyday Life The goal isn’t just a tidy space—it’s functionality. When a garage and storage system work properly, everything from hurricane prep to Saturday fishing trips becomes easier. Designing these zones with intention is another way South Texas Home Builders creates homes that live as well as they look: efficient, durable, and ready for whatever the coast brings next.
More Posts